
Accessible Vancouver travel benefits from a compact downtown peninsula, a transit network with dedicated accessibility information and a large amount of waterfront public space. TransLink publishes guidance for bus, SkyTrain, SeaBus and West Coast Express travel, plus information about HandyDART and other access programs.
Vancouver is not flat everywhere. Some downtown streets rise quickly, North Shore destinations add slopes, and forest or shoreline routes vary from smooth pavement to more demanding surfaces. The key is separating the city’s genuinely easy roll-and-stroll routes from outdoor experiences that need more detailed terrain research.
Vancouver: accessible travel at a glance
| Ideal stay | 3 to 4 days |
|---|---|
| Best for | waterfront routes, accessible transit, parks, markets and compact neighbourhood sightseeing |
| Car | not needed for most central sightseeing; transit is often easier than downtown parking |
| Main planning issue | hills, rain, elevator outages and park routes with changing gradients or surfaces |
What “accessible” should mean when you plan
Accessibility is personal. Two travellers who both use wheelchairs may need different doorway widths, transfer space, slopes or assistance. A traveller with low vision, hearing loss, chronic pain, fatigue, autism or another non-visible disability may need completely different information. I therefore use the word accessible only as a starting point, never as a guarantee that one route works for everyone.
Before paying for anything non-refundable, write down the features that are essential for you: step-free entry, lift dimensions, roll-in shower, bed clearance, visual alarms, quiet space, refrigerator for medication, proximity to transit, accessible parking, companion seating or a specific mobility-aid limit. Then verify those items with the operator that controls them.
How I would plan an accessible trip to Vancouver
Use TransLink accessibility information as your transport baseline
TransLink provides dedicated guidance for buses, SkyTrain, SeaBus and West Coast Express. Check current elevator or service alerts before relying on one interchange.
Stay close to a useful SkyTrain station
Downtown, Yaletown and areas near Canada Line stations can reduce surface travel. Verify that the exact station entrance you intend to use is step-free.
Treat the Seawall as a route, not one giant attraction
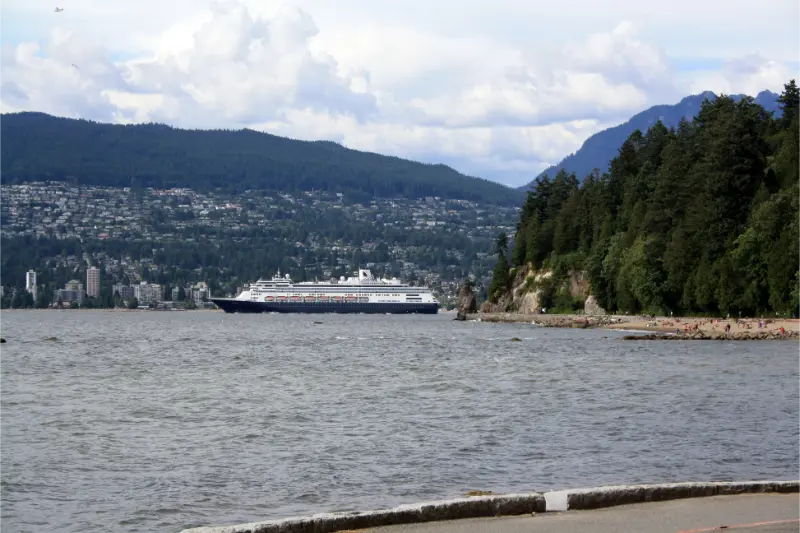
The waterfront can be broken into short sections with cafés, washrooms and transit nearby. Stanley Park is large, so choose a manageable segment rather than assuming a full circuit is necessary.
Granville Island needs arrival planning
The public market area is compact once you arrive, but the best approach depends on your mobility needs. Compare bus, taxi and accessible ferry information rather than defaulting to the prettiest route.
Use SeaBus for scenery with transport value
A harbour crossing can double as sightseeing and a practical connection to the North Shore. Check the accessible path from the terminal to your next stop.
Expect rain to change surface comfort
Wet leaves, puddles and slick ramps can matter. A waterproof layer and shoes or tyres suited to rain are more useful than a complicated indoor-only backup itinerary.
Research mountain attractions separately
Gondolas and visitor facilities may have accessible components, but trails, snow conditions and connecting transport vary widely. Verify the exact experience, not just the destination name.
Choosing an accessible hotel
Hotel filters are useful for finding candidates, but they are not enough for a final decision. “Accessible room” can refer to different layouts even inside the same property. I would contact the hotel and ask about the exact room category, step-free route from street or parking, lift access, doorway width if relevant, bathroom layout, shower or tub, grab bars, bed height, space beside the bed and any equipment you need to charge.
If your trip depends on a particular room feature, ask for written confirmation and keep it with the reservation. Compare current properties and refundable rates on Booking.com but verify critical accessibility details directly with the hotel before the free-cancellation deadline.
Getting around without unnecessary transfers
Transfers are where accessible itineraries often become fragile. Every extra connection adds another platform, lift, curb, weather exposure or chance of delay. I prefer direct routes even when they look slightly slower on a journey planner. Save the accessible-transit page and live service-alert page to your phone, and take a screenshot of any important assistance confirmation in case mobile data is weak.
If you use a wheelchair or scooter, check size and weight limits for vehicles and lifts. If fatigue or pain is the main concern, build seated breaks into the route before you need them. A short taxi ride can sometimes be the most efficient accessibility tool in the itinerary rather than an unnecessary luxury.
A realistic 3 to 4 days accessible itinerary
This itinerary is deliberately light. The objective is not to prove how much can fit into one day; it is to keep enough margin for boarding, washrooms, queues, rest, equipment checks and unexpected route changes.
Day 1
Canada Place, Coal Harbour and a selected Stanley Park waterfront section.
Day 2
Granville Island and False Creek, with a flexible transport choice based on your mobility device and weather.

Day 3
Downtown to SeaBus and Lower Lonsdale, returning for Gastown only if the surfaces and gradients suit you.
Day 4
Choose an accessible garden, museum or North Shore attraction after checking current terrain and transport details.
Accessible toilets, rest stops and energy management
Accessible travel improves dramatically when toilets and rest stops are planned as part of the route. Museums, visitor centres, shopping centres and large public attractions are useful anchors because they usually provide more predictable facilities than small independent businesses. Do not assume a washroom marked accessible will match your transfer or caregiver needs; where this is critical, contact the venue.
For travellers managing fatigue, pain or heat sensitivity, I would plan the longest outdoor segment first, when energy is highest, and keep the afternoon close to transport. A folding cushion, water bottle, medication kit, portable charger and a small repair kit for mobility equipment can be more useful than adding one more attraction.
Weather can change accessibility
Canada’s weather is not just a packing question. Snow can block curb cuts, rain can make wooden surfaces slick, heat can increase fatigue and mountain conditions can leave ice on a supposedly easy path. Check the short-range forecast and any attraction or park advisories again on the morning of travel.
In winter, I would prioritize a hotel with a genuinely short step-free route to useful transport rather than a cheaper room several blocks away. In summer, build shade and indoor breaks into the day. Shoulder seasons can be excellent, but freeze-thaw conditions and maintenance work create their own barriers.
Questions to ask before booking a tour or attraction
- Is the entrance step-free from the street, parking area or drop-off?
- Are all parts of the advertised experience accessible, or only selected sections?
- What are the lift, ramp or mobility-device size limits?
- Is there accessible seating and can it be reserved?
- Are accessible washrooms on the same level as the main experience?
- Can a support person accompany the traveller without an additional fee?
- Are service animals permitted in every part of the experience?
- What happens if an elevator or lift is out of service?
For a high-priority experience, call or email rather than relying only on a generic website icon. The answer can also reveal whether staff understand the practical details of their own accessibility provision.
Transporting a wheelchair, scooter or other mobility aid
For flights or long-distance transport, keep the make, model, dimensions, weight and battery information for your mobility aid. Photograph the equipment before handing it over and label removable parts. The Canadian Transportation Agency publishes specific guidance on travelling with mobility aids and assistive devices on federally regulated transport.
If your chair has a complex power system, bring concise handling instructions that a baggage or transport team can follow. Carry essential detachable components, medication and chargers in accordance with carrier rules whenever possible rather than placing every critical item out of reach.
What I would not assume
I would not assume that a heritage district is impossible, that a modern building is automatically perfect, that every station on an accessible route has a working elevator, or that an “easy” nature trail is wheelchair-friendly. I would also avoid basing a trip on old blog posts because access projects and temporary closures change quickly.
The most reliable strategy is a layered one: official accessibility information first, direct confirmation for critical details second, and recent traveller experience as a useful supplement rather than the final authority.
Useful official accessibility resources
These are the pages I would check again shortly before travel:
Related Dreaming of Canada guides
- Vancouver Travel Guide
- How to Get Around Vancouver
- 3 Days in Vancouver
- Vancouver Neighbourhoods Guide
Frequently asked questions about accessible travel in Vancouver
Is Vancouver good for wheelchair users?
Many central routes and transport services are designed with accessibility in mind, but hills, park surfaces and individual businesses vary.
Is Vancouver public transport accessible?
TransLink provides dedicated accessible-travel guidance across its major modes. Check current service and elevator information for the route you plan to use.
Is Stanley Park wheelchair accessible?
Parts of the park, including major paved waterfront areas, can work well, but the park is large and not every trail or facility has the same terrain.
Do I need a rental car?
Not for most central sightseeing. A car can add complexity through parking and loading rather than solving every access problem.
What is the biggest planning issue?
Choosing routes with manageable gradients and confirming the last part of the journey from transit to the attraction entrance.
My final planning advice for Vancouver
An accessible trip works best when the difficult details are solved before they become emergencies. Verify the hotel room, reduce unnecessary transfers, keep a transport backup and confirm the exact route into your highest-priority attraction. That leaves more of the trip for what you actually came to experience rather than for solving logistics on the pavement.
Accessibility information can change. Always confirm current services and individual requirements with the transport operator, hotel, attraction or park before travel. Disclosure: some links in this article may be affiliate links. If you make a booking through them, Dreaming of Canada may earn a commission at no extra cost to you.